Setting Up a VM
Installing VirtualBox
First download the VirtualBox installer from official web page according to your OS. After finishing the download, launch the installer and follow the instruction of the installer. VirtualBox is a virtualization software which allows you to create VMs that run OSes including Linux on your computer without removing your currently-using OSes such as Windows and macOS. In this course, we execute Linux on the VM made by VirtualBox.
Download the reference VM image
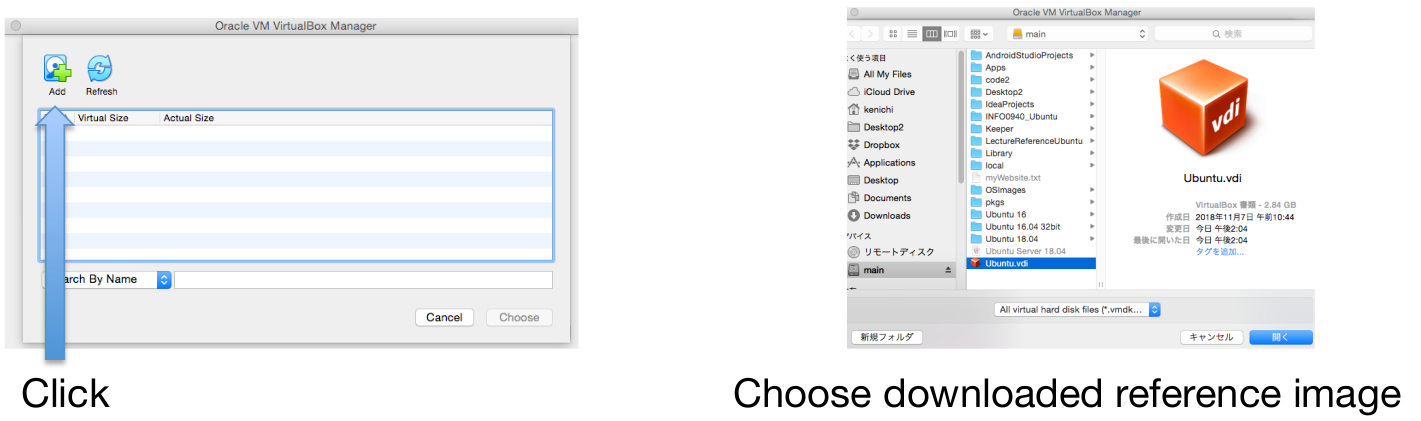
Then download the reference VM image from here.
We use this image for the course. TAs will not be able to support if you use other VM images prepared by yourself.
The image contains Ubuntu 16.04 LTS 32 bit. We use the 32 bit image in order to avoid compatibility issue in the submission platform.
The default user of the VM image is student. The password for the user is also student.
Launch the downloaded VM image on VirtualBox
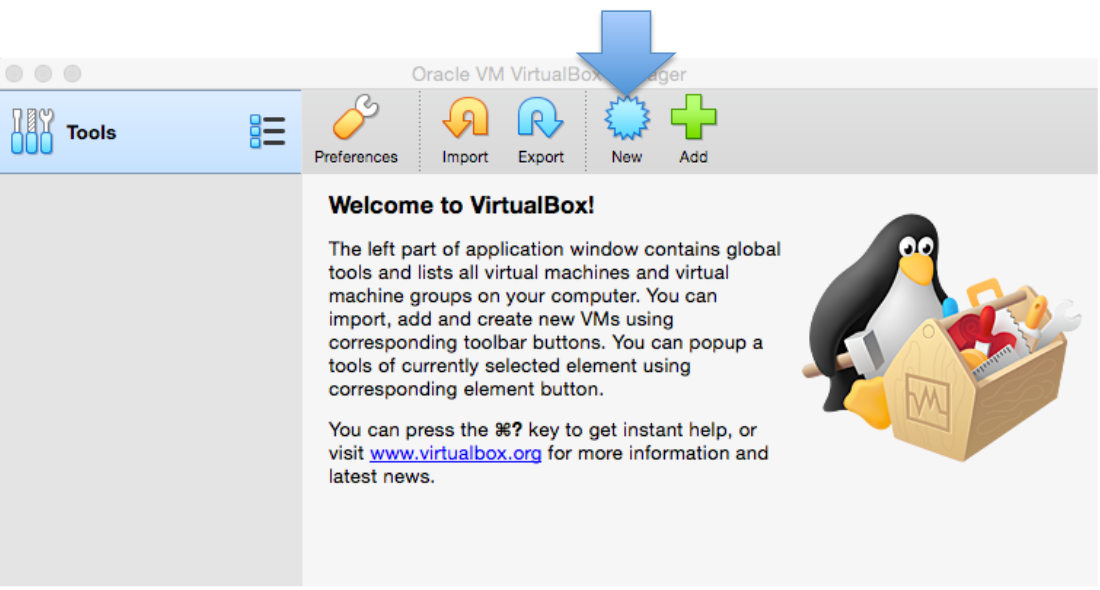
Click “New” button to create a VM.
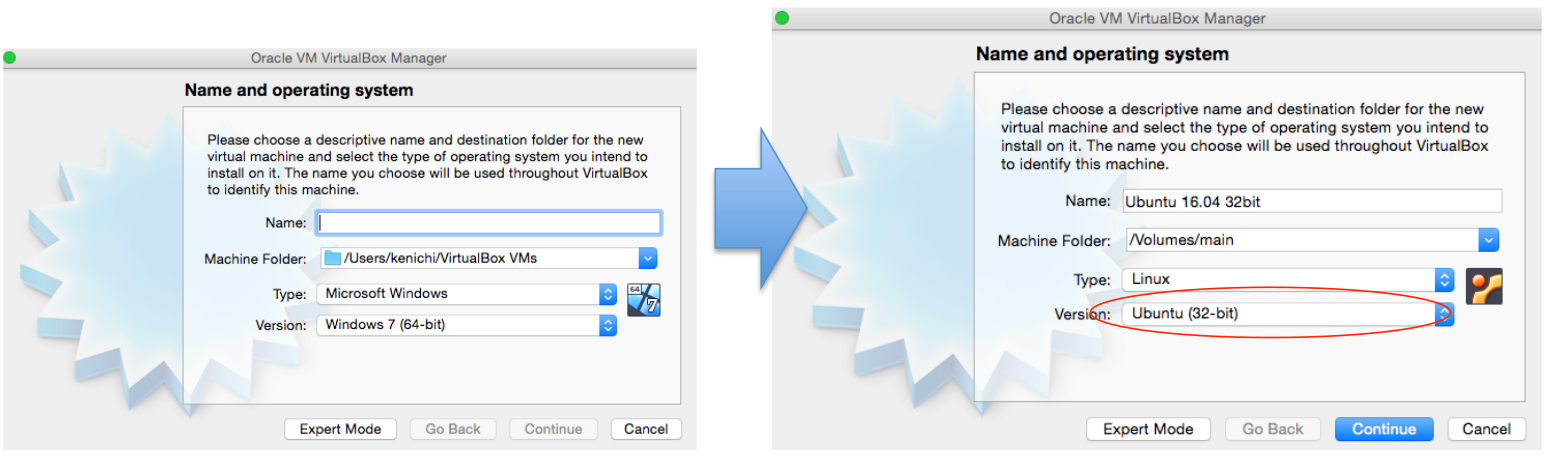
Fill basic info. (Please choose 32-bit)
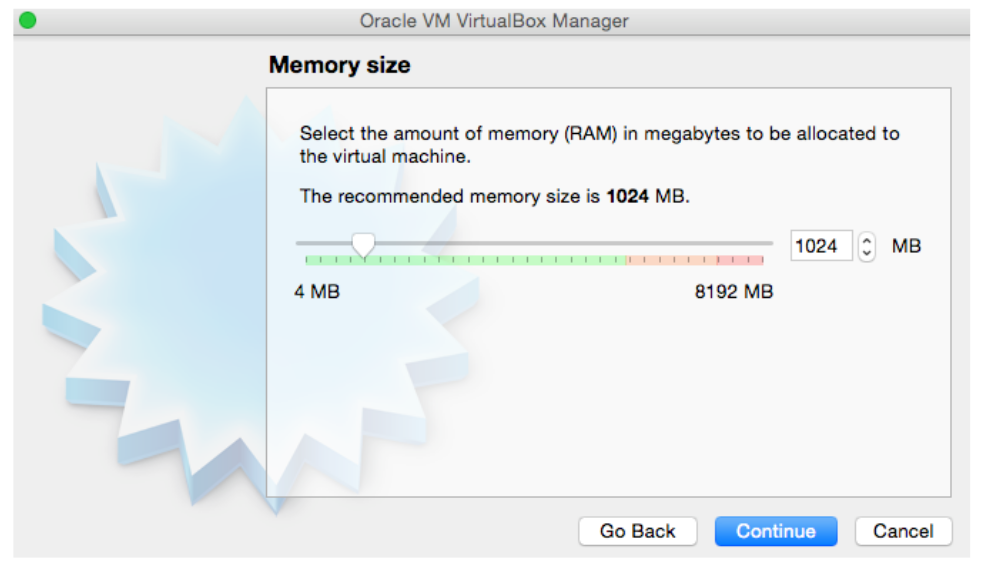
Choose VM memory size. (1024MB is fine)
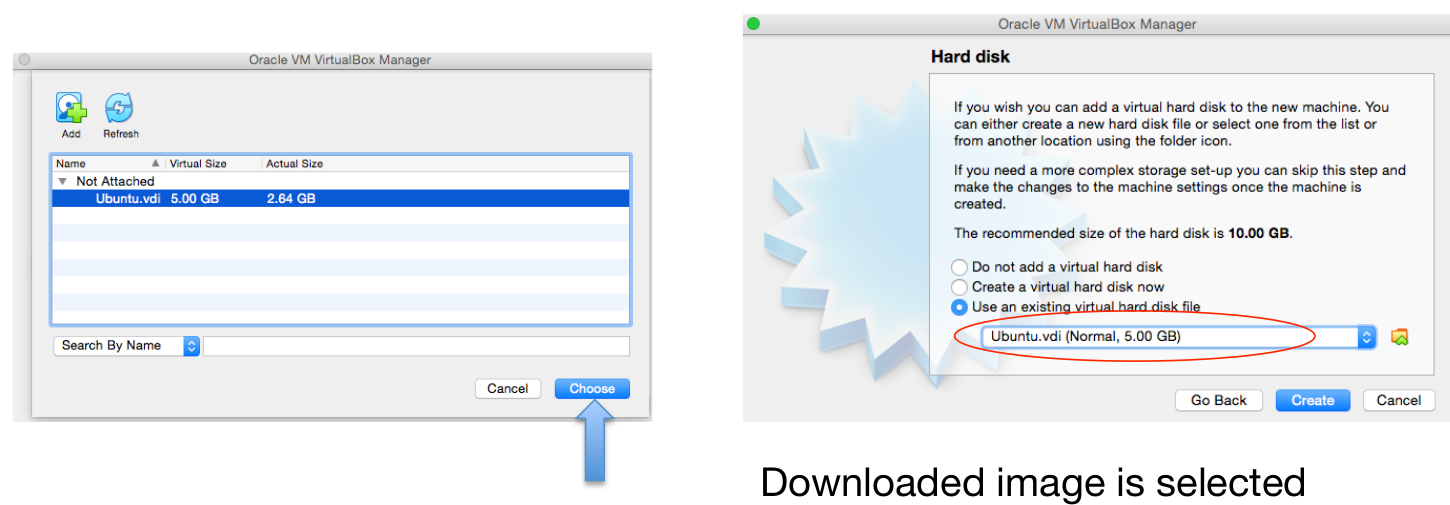
Choose “Use an existing virtual hard disk file”, and click the folder button
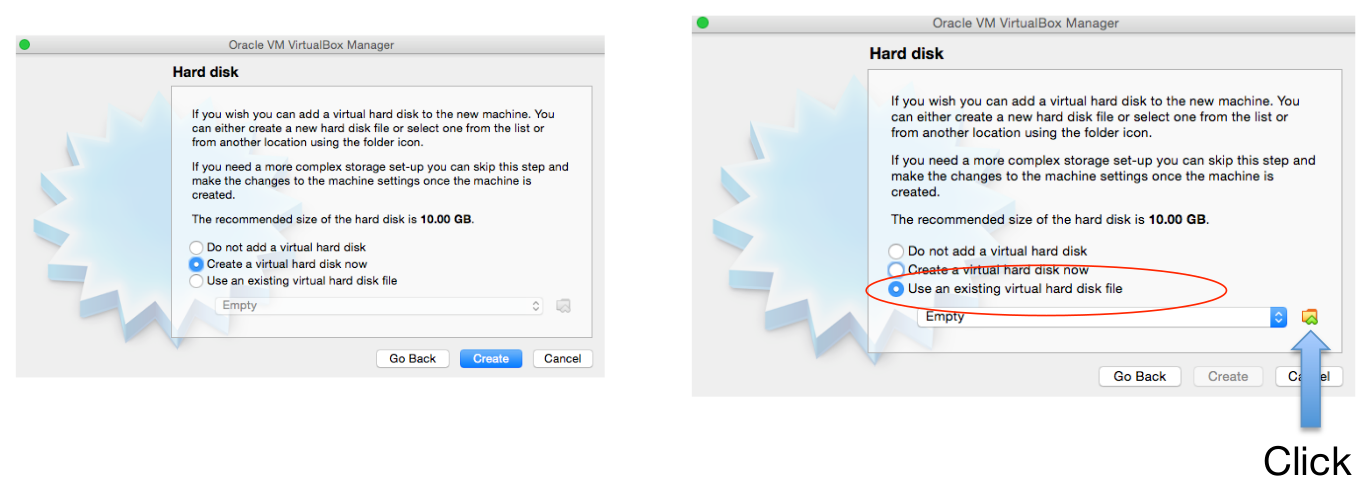
Click “Add”, and choose the reference VM image.
Click “continue”, and please confirm the reference VM image is properly selected.
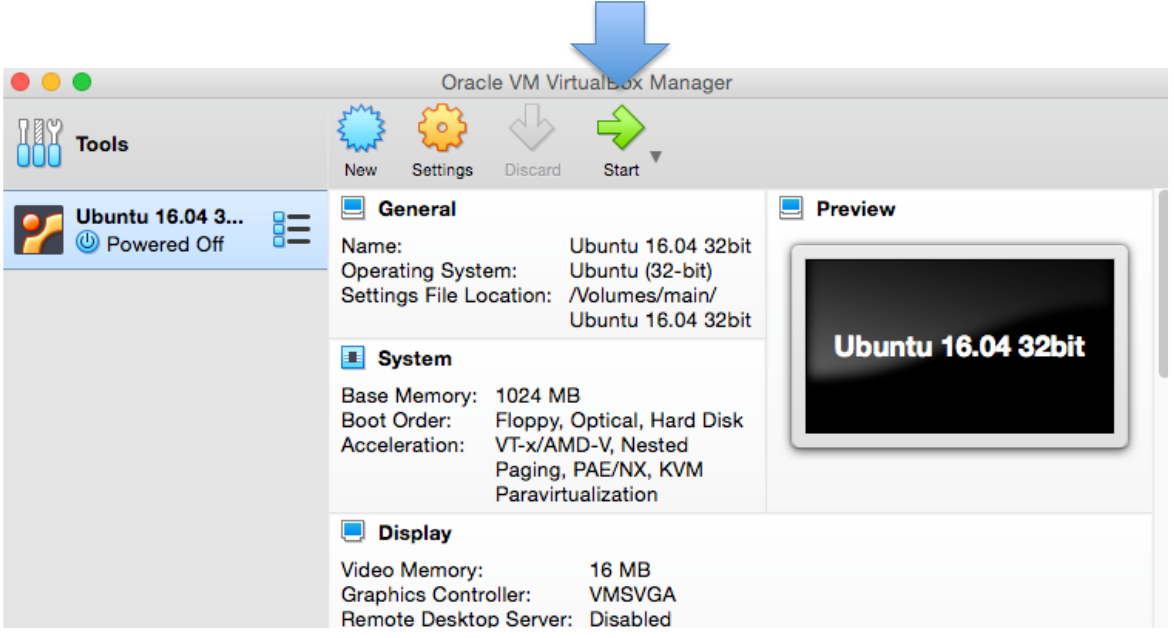
Click “Start” to launch the VM
Connect to the VM via ssh
For connecting to a VM using ssh, we need a special network setup in VirtualBox. Four of the network cards can be configured in the Network section of the Settings dialog in the graphical user interface of Oracle VM VirtualBox.
- NAT: VirtualBox act as a normal process which tries to access the web when the VM initiate a connection.
+Simple.
-Virtual machine not accessible from outside, not even from host.
- Bridge: VirtualBox plugs itself to the real card, and acts as if you used a switch.
+Access from outside (from the world only if you get public IP address).
-Don’t work with Wifi (do not work on ULiege Wifi, but does work on ms8xx machines).
- Internal Network: Network between VMs, invisible to the host or the outside.
+Secure communication between VMs.
-No access to or from host or outside (no internet).
- Host private network: Like internal network but creates a virtual interface on the host too.
+Fine-tuning is possible (router on the host, …).
-Internet connection tricky to configure (create a router between virtual interface on host and the real. interface).
In our case, we will use NAT Network.
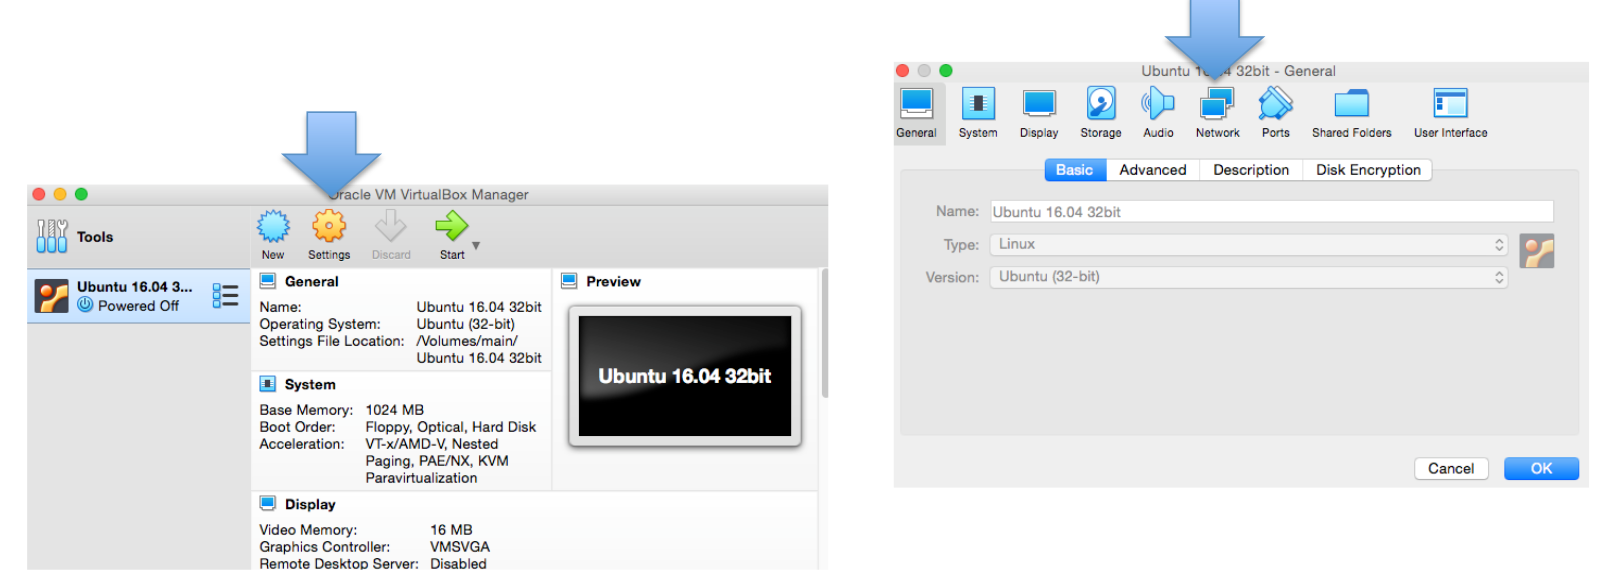
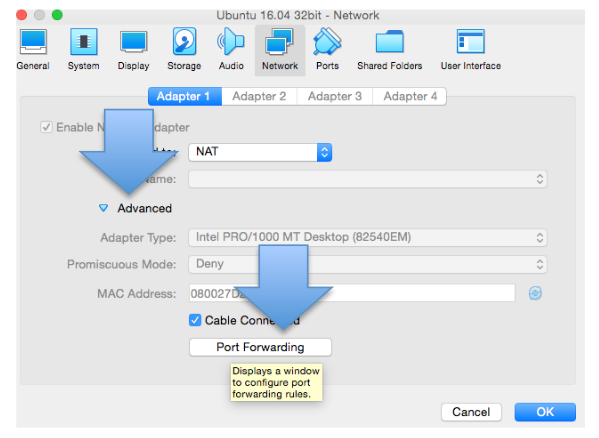
Click “Setting”, and choose “Network” tab in the setting menu.
Click “Advanced”, and choose “Port Forwarding”.
Click green “+” button, and type info as follows.
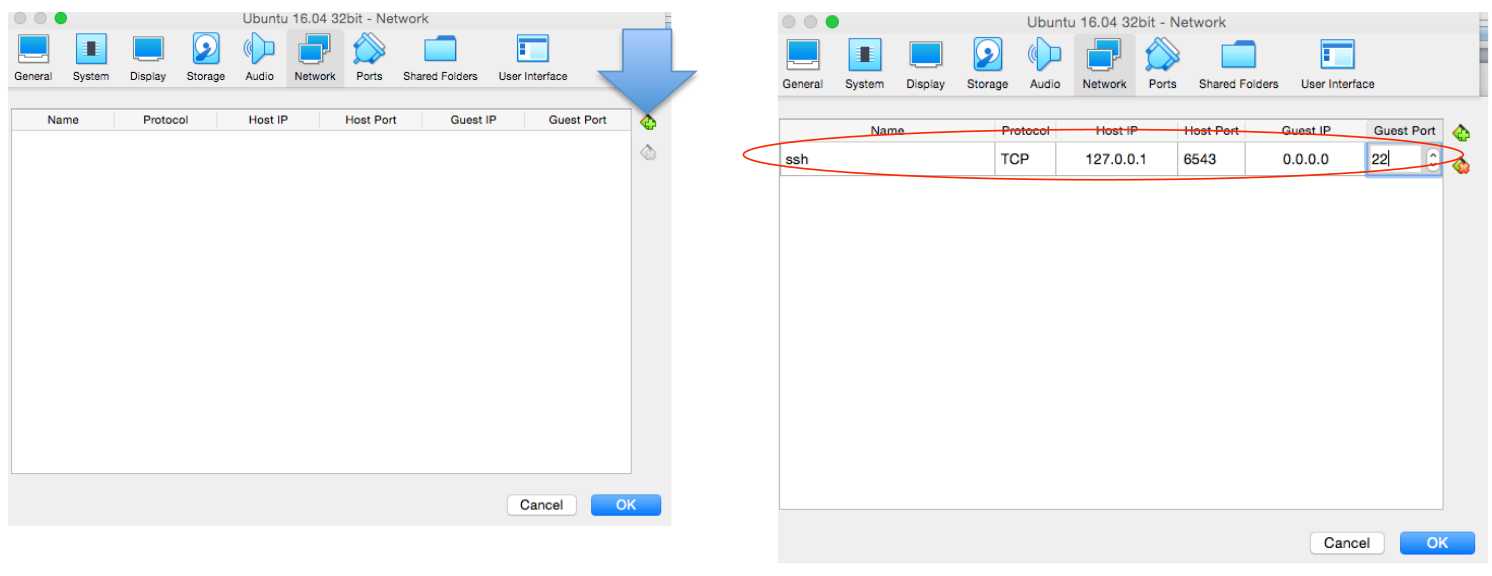
Some details
Name: ssh ( anything would be fine )
Protocol: TCP
Host IP: 127.0.0.1
Host Port: 6543 ( mostly any number (>1024) would be OK )
Guest Port: 22
Connect to the VM by ssh
Please type the following command on your terminal app. The VM will ask your password, and please type “student” for it.:
$ ssh student@127.0.0.1 -p 6543
If you are using Windows, you can use PowerShell or CommandPrompt.
Update package information
Please type the following command on your terminal app after connecting to the VM by ssh.:
$ sudo apt update
Danger
NEVER upgrade ubuntu 16 to ubuntu 18! Otherwise you will have some troubles with the submission platform.