Setting Up ssh
Key-based Authentication
In many cases, by default, the ssh server accepts password-based authentication. However, this is not secure. In this world, there are a lot of people who attempt to login to your server by submitting a huge number of pairs of username and password (brute-force attack). Therefore, it is common to setup key-based authentication, and disable password authentication.
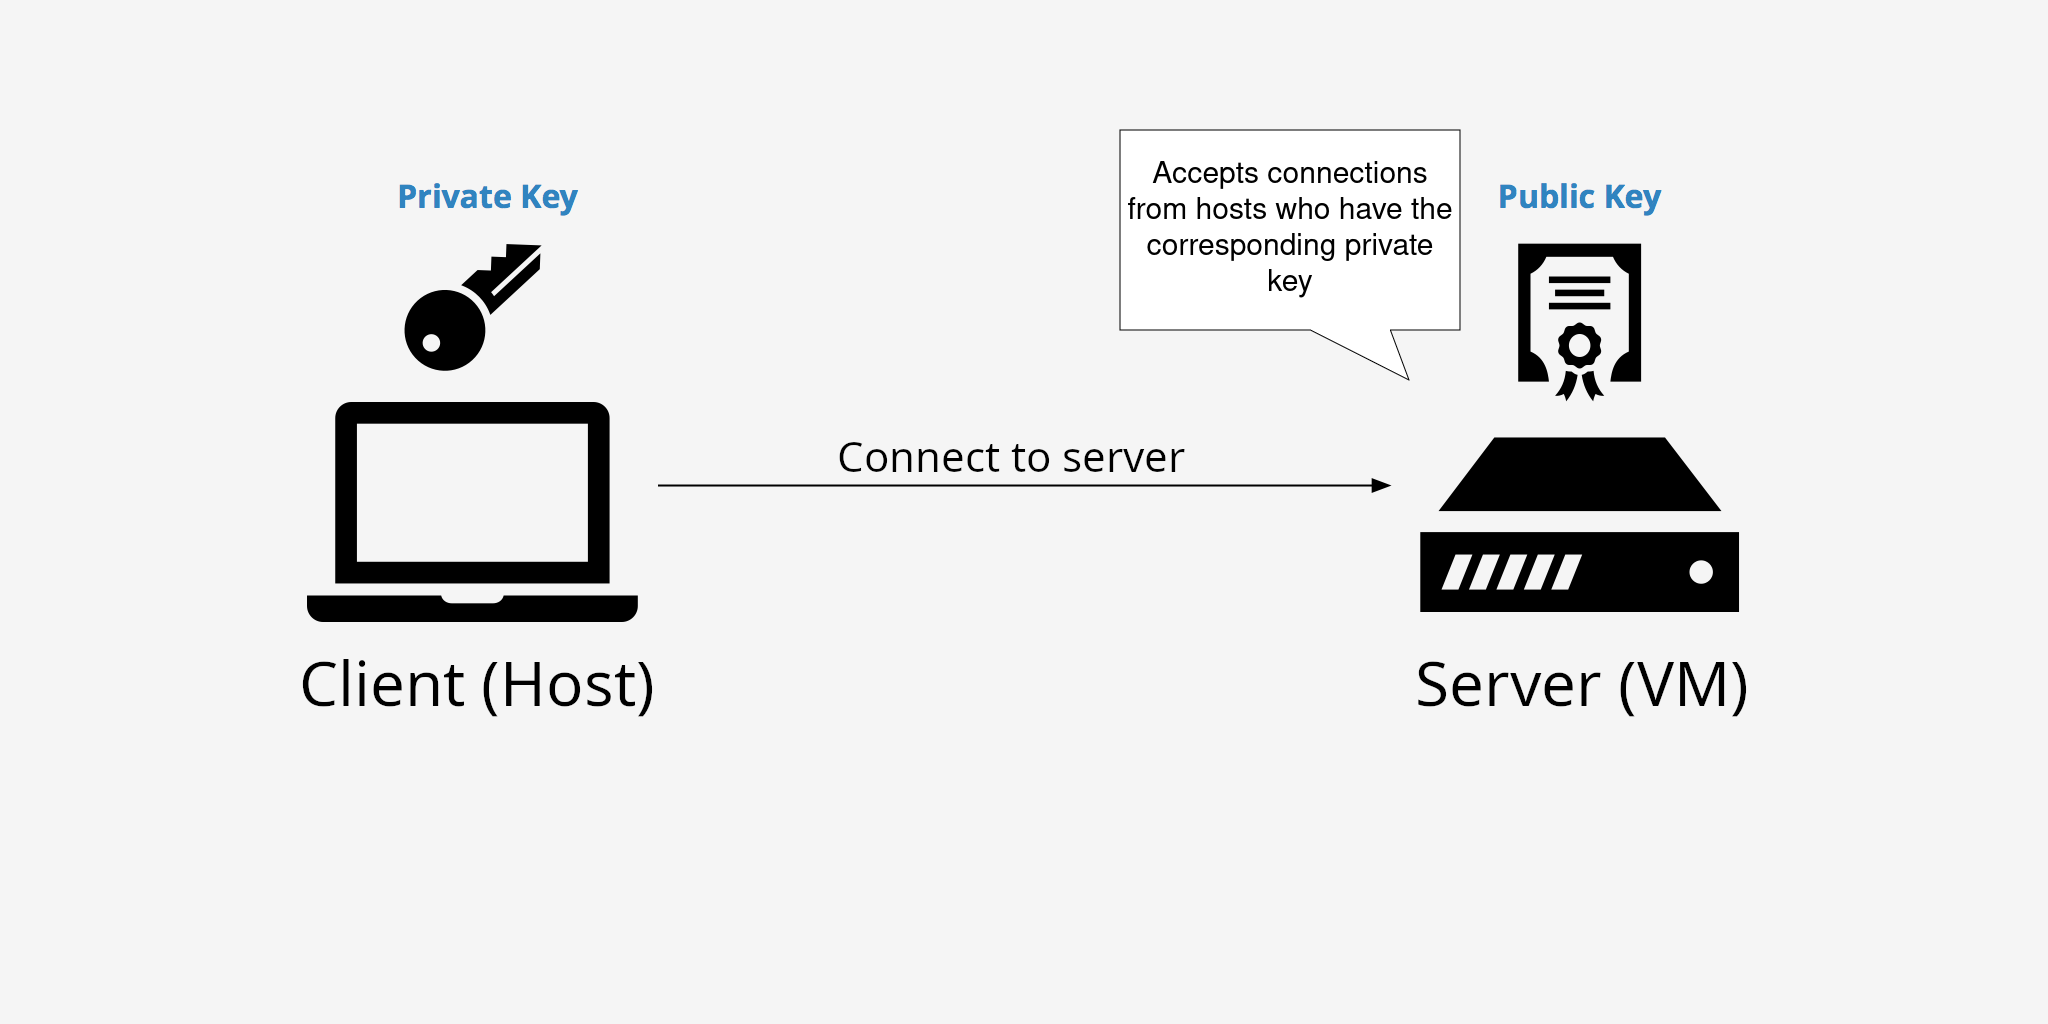
Key-based authentication uses a pair of private and public keys. The public key, as the name suggests, is not a secret and can be shared openly. Placing the public key on the server you want to connect to (in this case, in the VM) allows anyone who has the corresponding private key to connect to the server. The private key, in contrast, must be kept secure and only on the machine(s) you use to connect to the server/VM. If someone gets your private key, they can connect to the server where your public key is registered.
Steps for key-based authentication (2 next sections of the tutorial) are:
Prepare a pair of private and public keys on your local machine (not on the VM).
Register the public key in the VM.
Prepare a pair of private and public keys
On Linux/Mac: If your local machine does not have a directory “~/.ssh”, please create it and change its permission as follows:
$ mkdir ~/.ssh
$ chmod 700 ~/.ssh
Please type following command on your local machine (not the VM). The keys are placed in “~/.ssh”. The public key is named “info0940_id_rsa.pub” and the private key is “info0940_id_rsa”.
For Mac and UNIX/Linux users:
$ ssh-keygen -f ~/.ssh/info0940_id_rsa
For Windows users (type this in your home directory):
$ ssh-keygen -f .ssh/info0940_id_rsa
Danger
-f specified the name (and path) of the key. If you do not specify
-f, you may OVERWRITE your old ssh key, and may lose accessibility to
servers that register your key. If you do not have any ssh key you can omit
the -f argument and simply type ssh-keygen in your terminal. Default
names for the key pair will be chosen and you won’t have to specify the
name of the key pair when connecting via ssh.
You can check the content of the public key by the following command.:
$ cat ~/.ssh/info0940_id_rsa.pub
ssh-rsa AAAAAAAAAAAAABBBBBBBBBBBBBBBBBCCCCCCCCCCCCCCCCCCCCCCCCCCCCCCCCCCCCCCCCCDDDDDDDDDDDEFFFFFFFGGG
GGGGGGGGGGGGGGGHHHHHHHHHHHHHHHHHIIIIIIIIIIIIIIIJJJJJJJJJJJJJKKKKKKKKKKKKKLLLLLLLLLLLLLLLLLLLLLLLLLLLL
CCCCCCCCCCCCCCCCCCCCCCCCZZZZZZZZZZZZZZZZZZZZZIIIIIIIIIIIIIIIIIIIIIIIIIIIIIIIIIIIIIIIIIIIIGGGGGGGGGGGG
LLLMMMMMMMMMMMMMMMM username@local.machine
Register the public key with the VM
If your VM does not have a directory “~/.ssh”, create it and change its permission as follows.:
$ mkdir ~/.ssh
$ chmod 700 ~/.ssh
For registering a public key, we need to edit a file named “~/.ssh/authorized_keys” on the VM. In the following example, we use “neovim” as an editor but you are free to use another one:
$ nvim ~/.ssh/authorized_keys
To register a public key, append the contents of the “info0940_id_rsa.pub” file from your local machine to the “authorized_keys” file located at “~/.ssh/” in your VM. After the edit, the content of “authorized_keys” will look like this:
$ cat ~/.ssh/authorized_keys
ssh-rsa AAAAAAAAAAAAABBBBBBBBBBBBBBBBBCCCCCCCCCCCCCCCCCCCCCCCCCCCCCCCCCCCCCCCCCDDDDDDDDDDDEFFFFFFFGGG
GGGGGGGGGGGGGGGHHHHHHHHHHHHHHHHHIIIIIIIIIIIIIIIJJJJJJJJJJJJJKKKKKKKKKKKKKLLLLLLLLLLLLLLLLLLLLLLLLLLLL
CCCCCCCCCCCCCCCCCCCCCCCCZZZZZZZZZZZZZZZZZZZZZIIIIIIIIIIIIIIIIIIIIIIIIIIIIIIIIIIIIIIIIIIIIGGGGGGGGGGGG
LLLMMMMMMMMMMMMMMMM username@local.machine
Confirmation
Please type the following command on your terminal app for checking the key is properly registered. If the VM does not ask your password, it is working. Otherwise, something is wrong.:
$ ssh -i ~/.ssh/info0940_id_rsa student@127.0.0.1 -p 6543
Disable Password Authentication (can be skipped)
Important
In this section, we will disable password authentication to the VM. In other words, only connection with SSH key will be accepted. If you still want to connect to your VM with the “student” password, skip this section.
On your VM, change the option “PasswordAuthentication” from “yes” to “no” in the ssh configuration file named “/etc/ssh/sshd_config”. Please use an editor you like for editing the file.:
$ sudo nvim /etc/ssh/sshd_config
After the modification, the file will be as follows:
# To disable tunnelled clear text passwords, change to "no" here!
PasswordAuthentication no
#PermitEmptyPasswords no
After you modify the sshd config, please type the following command for restarting the ssh server.:
$ sudo service ssh restart
Please type the following command on your host machine for checking the config is properly updated. If you see the following output, configuration is correct. If the VM asks password, something is wrong:
$ ssh abc@127.0.0.1 -p 6543
abc@127.0.0.1: Permission denied (publickey).
The meaning of output is that the ssh server denied the access to the user named “abc” because the public key for abc is not registered. An important thing is that the server denies access without asking password. Namely, this setup eliminates the chance for brute-force attacks.
Important Info
You can give your public key to anyone. For instance, if you request a system administrator to give accessibility for private servers that disabled password authentication, the admin may ask you to send your public key.
Danger
NEVER ever give your PRIVATE key to anybody!!! If someone has your private key, they can login to servers where your public key is registered and things might go terribly wrong…
TAs hear some stories that sysadmins in companies laugh at employees who send their private keys when they request access to company’s servers…